






-
 Generic medicines
-
Made in Sri Lanka
-
Value Wishes Gifts
-
Food and Beverage
-
Custom Pharmaceutical Preparations
-
Printing and Packaging
-
Textiles and Apparels
-
Minerals, Chemicals and Energy
-
Professional services
-
Manufacturing and Processing machinery
-
Beauty , Cosmetics and Personal care
-
Ayurvedic & Herbal
-
Hospital & Ward Supplies
-
Value Pharma Offers
-
Vitamins, Nutraceuticals & Supplements
-
Medical Supplies, devices , Aids & Wellness
-
Surgical & Medical Consumables
-
Mother kids and Baby
-
Sexual Wellness Products
-
Animal Medicines and Veterinary
-
Caregiver Essentials & Accessories
-
Wound Care & Dressing


-
 Generic medicines
-
 Made in Sri Lanka
-
 Value Wishes Gifts
-
 Food and Beverage
-
 Custom Pharmaceutical Preparations
-
 Printing and Packaging
-
 Textiles and Apparels
-
 Minerals, Chemicals and Energy
-
 Professional services
-
 Manufacturing and Processing machinery
-
 Beauty , Cosmetics and Personal care
-
 Ayurvedic & Herbal
-
 Hospital & Ward Supplies
-
 Value Pharma Offers
-
 Vitamins, Nutraceuticals & Supplements
-
 Medical Supplies, devices , Aids & Wellness
-
 Surgical & Medical Consumables
-
 Mother kids and Baby
-
 Sexual Wellness Products
-
 Animal Medicines and Veterinary
-
 Caregiver Essentials & Accessories
-
 Wound Care & Dressing
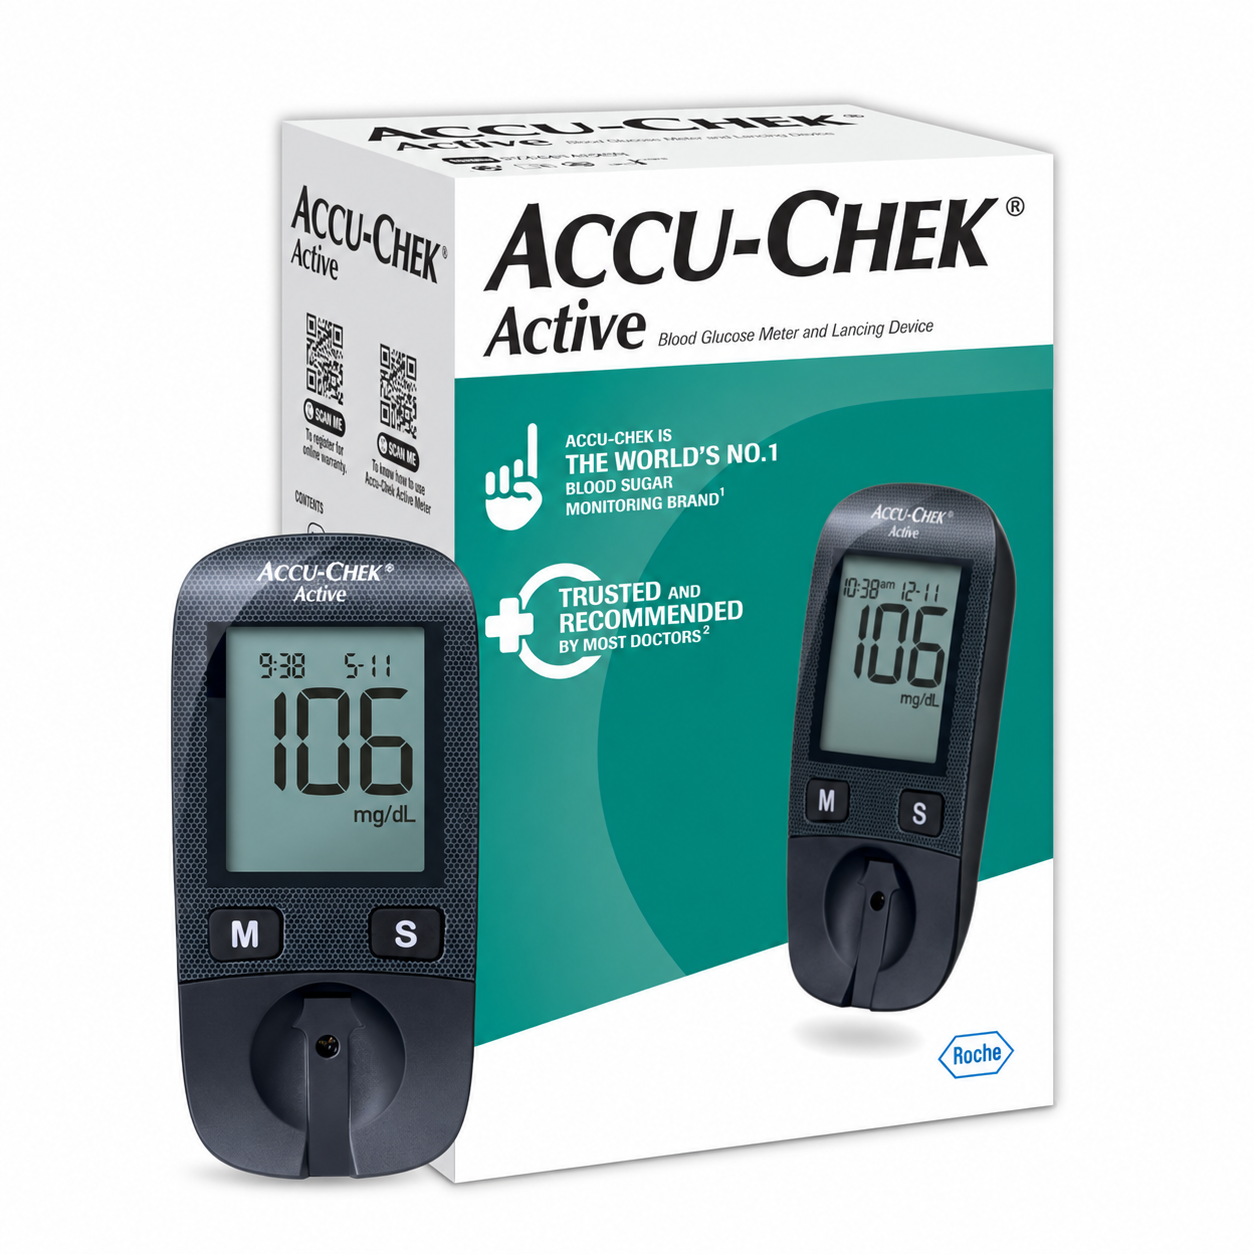
Accu-Chek® Active blood glucose meter
Top Selling Products
-
Rs.0.00
-
Rs.0.00
-
Rs.0.00
-
Rs.0.00






Product Information
| Product Name | Accu-Chek® Active blood glucose meter |
| Introductory Video / Attachments | |
| Unit price | $15,600.00 |
| Price / Discount | $15,595.00 $5.00 OFF |
Product Description & Specifications
PRODIGY AutoCode® requires No Coding; simply insert the test strip into the strip port and the PRODIGY AutoCode® automatically powers on. The PRODIGY AutoCode® talking meter guides the user through the blood glucose testing steps and speaks in English, Spanish, French, and Arabic. It provides results in seven seconds, has a 450-test memory with date and time, and provides 7, 14, and 28 day averages. The USB port feature is present for downloading your meter’s result using our free diabetes management software. Our meters require a small blood sample, and are approved for alternate site testing.
Features
• Speaks in 4 Languages: English, Spanish, French &
Arabic
• Stores 450 test results with date and time
• Approved for Alternate Site Testing (AST)
• Standard USB port to easily download test results
Blood Glucose Testing
Wash your hands and the intended testing site before using the system and after obtaining a blood sample. Only use fresh capillary blood samples for testing. Always use a new, sterile lancet and keep the lancing device clean. Applying Blood Correctly With the test strip inserted into the meter, bring it to the test site and place the tip next to the blood drop. Blood will automatically be drawn into the absorbent channel once the test strip is close enough. Do not smear blood onto the test strip or place the blood on top of the test strip
Performing a Blood Glucose Test
Insert Test Strip Insert the test strip and the meter will power on automatically. No Coding Required.
1. “Your Prodigy meter is on... Please apply blood into the test strip.” Apply the Blood Sample When “ “ appears, apply blood.
2. The meter will beep. “Testing.” The meter will count down from 6 to 1.
3. Hear and See Test Results “Blood glucose, 103 milligrams per deciliter.”
4. Re-cap the Lancing Device Cover.
5. The Adjustable Tip offers 10 levels of skin penetration. To select the desired depth, twist the Adjustable Tip in either direction until the preferred setting lines up with the arrow
6. Slowly pull the Loading Barrel away from the Lancing Device until you hear a click, indicating that the Lancet Carrier is locked into position. Release the Loading Barrel to return it to its original position.
7. Position the end of the Adjustable Tip against the side-tip of the finger or alternate testing site. Press the Trigger Button and then lift the Lancing Device away from the testing site after the puncture is complete.
8. Wait a few seconds for a blood drop to form. To help form a blood drop, gently massage the testing area.
9. Remove the Lancing Device Cover and push the Lancet Ejector to release the Lancet from the Lancet Carrier. Dispose of the used Lancet into the appropriate Sharps or Bio-hazard container.
Shipping Information
| Lead Time | 2 Days |
| Shipping Method / Terms | Flat Rate |
| Shipping cost | Free |
Payment Options
| Payment Methods | Online Payments |
| Company Name | |
| Business Type | Online |
| Reviews & Ratings |
Reviews & Ratings
0
out of 5.0
(0 reviews)
There have been no reviews for this product yet.
|
Quick Questions (Click to add to message)
Top Selling Products
-
Rs.0.00
-
Rs.0.00
-
Rs.0.00
-
Rs.0.00
Related products
Follow Us On
Mobile Apps